
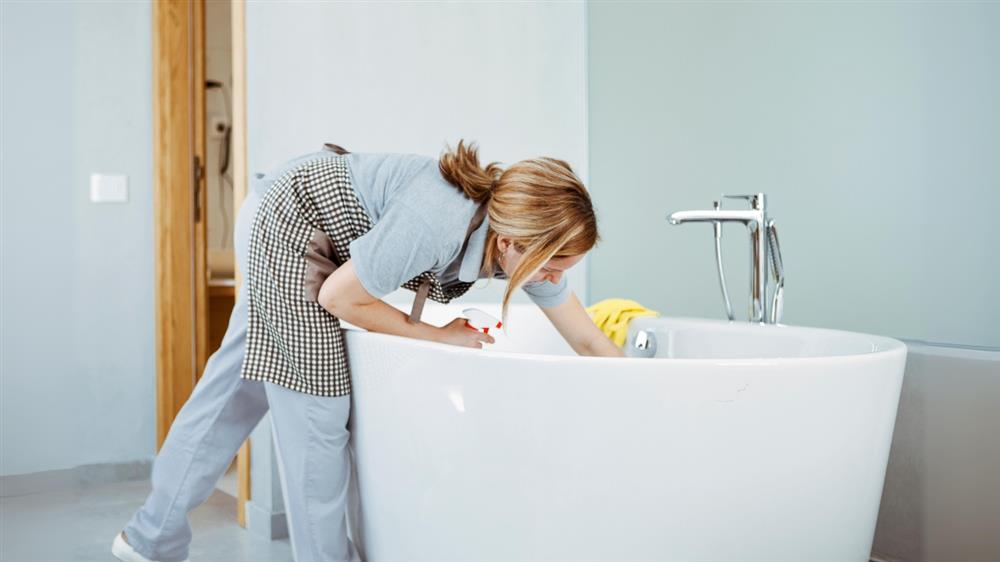
A clean bathtub brings comfort to your daily routine and helps your home stay in good shape. Many homeowners clean their tubs only when they notice dirt or rings, but regular care prevents bigger problems like stains, leaks, or damage that costs money to fix. This guide shares practical bathtub maintenance tips you can follow step by step. You will learn how to handle different materials, remove common buildup, and set up simple habits that keep your tub looking and working well for years.
Taking time for proper care saves you from replacing the tub early or dealing with costly repairs. Simple actions each week add up to noticeable improvements in appearance and hygiene. Whether you have a new tub or an older one, these methods work across most homes and require basic supplies you probably already own or can buy cheaply.
Why Bathtub Maintenance Matters for Your Home
Regular bathtub maintenance protects your investment and improves your family’s health. Soap scum, body oils, and minerals from water collect quickly on surfaces. Over time these layers create rough spots where bacteria grow more easily. A well-maintained tub stays smoother and easier to clean, which means less scrubbing later.
Water damage often starts small around the edges or drain. Tiny cracks in caulk let moisture reach walls or floors underneath. Fixing these early stops mold growth inside the structure of your home. Homeowners who stay consistent with care report fewer plumbing issues and better resale value when they eventually sell the house.
Another benefit shows up in your monthly bills. Clean fixtures and pipes flow better, which reduces strain on your water heater and plumbing system. You avoid clogs that waste water or cause backups. These bathtub maintenance tips help you catch small signs before they turn into expensive emergencies that require emergency plumber visits on weekends.
Many people overlook how a clean tub affects daily comfort. Slippery surfaces from buildup increase fall risks, especially for children and older adults. Simple cleaning routines make the space safer and more pleasant for everyone who uses it. Starting with basic habits now pays off in peace of mind and lower stress around household chores.
Understanding Your Bathtub Material and Specific Care Needs
Different bathtub materials need slightly different approaches to avoid damage. Acrylic tubs are popular because they feel warm and resist chips, but harsh chemicals can scratch or dull the finish. Use gentle cleaners and soft cloths instead of abrasive pads. Avoid acetone or strong solvents that eat away at the surface layer over repeated use.
Porcelain tubs offer durability and a classic look, but they chip if heavy objects drop inside. The enamel coating can stain from hair dye, wine, or certain medications. Clean these surfaces promptly after use and apply a mild abrasive only when necessary, followed by thorough rinsing. This keeps the glossy shine intact for decades.
Fiberglass tubs resemble acrylic but scratch more easily. They work well in many homes yet require extra caution with brushes. Stick to non-abrasive sponges and cleaners made for plastic surfaces. Small scratches can be buffed out carefully, but deep gouges often need professional repair kits or replacement.
Cast iron tubs with enamel coating stand up to heavy use and hold heat well. They weigh more and suit traditional bathrooms. These tubs handle slightly stronger cleaners than acrylic or fiberglass, but you still need to watch for chips in the enamel that expose the metal underneath to rust. Touch up small chips quickly with matching enamel paint designed for tubs.
Essential Tools and Supplies for Bathtub Maintenance
Gather the right tools before you start cleaning to make the job faster and more effective. Soft microfiber cloths prevent scratches on all surfaces. A non-abrasive sponge works for daily wipes, while a nylon brush helps reach corners without damaging finishes. Keep an old toothbrush for tight spots around faucets and drains.
Mild bathroom cleaners without bleach suit most tubs, but check labels for your specific material. White vinegar mixed with water handles mineral deposits safely. Baking soda acts as a gentle scrub for soap scum. Hydrogen peroxide helps with mold spots when used carefully. Avoid mixing chemicals unless you know they are safe together.
A squeegee removes water after every shower or bath and cuts down on spots. Rubber gloves protect your hands from cleaners. A small plastic scraper helps lift stubborn buildup without scratching. For drains, a flexible drain snake or baking soda and vinegar solution clears minor blockages before they worsen.
Store your supplies in a caddy under the sink so they stay handy. Replace sponges and cloths regularly to avoid spreading dirt. Good organization turns maintenance from a big project into a quick five-minute task you actually complete.
Daily Cleaning Routine for Bathtub Maintenance Tips
Wipe down your tub after each use to prevent buildup. Use a squeegee or dry cloth to remove standing water from the bottom and sides. This simple step stops water spots and soap residue from hardening. Pay attention to the drain area where hair and soap collect fastest.
Spray a light mist of diluted vinegar solution once a day if you have hard water. Let it sit for a minute then wipe away. This keeps mineral deposits from forming rings that become difficult later. Focus on high-use areas like the sides where arms and legs touch most often.
For quick daily care, keep a spray bottle with a mild cleaner in the bathroom. A quick spray and wipe takes less than two minutes but makes weekly cleaning much easier. Teach family members to rinse the tub after bathing, especially if they use bath oils or bubble products that leave film.
These small daily actions form the foundation of effective bathtub maintenance tips. Consistency matters more than intensity. Over a month you will notice the tub stays brighter and requires less effort during deeper cleans.
Weekly and Monthly Maintenance Tips
Set aside time once a week for a more thorough cleaning. Mix baking soda with a little water to form a paste. Apply it to the tub surfaces and let it sit for 10 to 15 minutes. Gently scrub with a soft sponge, focusing on corners and the drain. Rinse completely to remove all residue.
Check the caulk and grout lines weekly for signs of discoloration or gaps. Mildew often appears first in these areas. Clean with a mixture of hydrogen peroxide and baking soda, or use a commercial grout cleaner if needed. Reapply caulk as soon as you see cracks to keep water from seeping behind the tub.
Once a month, pour a kettle of boiling water down the drain followed by a cup of baking soda and a cup of vinegar. Let the mixture fizz for 10 minutes then flush with hot water. This natural method clears soap scum and hair buildup inside pipes before clogs form.
Monthly deep attention to the overflow plate and faucet base prevents hidden dirt from spreading. Remove these parts if possible and clean behind them. Small maintenance tasks like this extend the life of your entire bathroom plumbing system.
Removing Tough Stains and Buildup
Hard water rings respond well to vinegar soaks. Soak paper towels in white vinegar and lay them along the ring for 30 minutes. The acid breaks down minerals without heavy scrubbing. For stubborn rings, repeat the process or add baking soda for light abrasion.
Rust stains from metal objects need a different approach. Use a paste of lemon juice and salt or a commercial rust remover made for enamel. Apply, wait, and scrub gently. Never use steel wool on any tub surface because it leaves tiny scratches that collect more dirt later.
Hair dye or colored product stains lift with rubbing alcohol or a magic eraser sponge used lightly. Test in a small area first. For older stains, a longer dwell time with cleaner helps more than aggressive scrubbing. Patience prevents damage to the tub finish.
After removing stains, polish the surface with a small amount of car wax made for plastic or a dedicated tub polish. This creates a protective layer that repels future dirt and makes cleaning easier next time. Apply sparingly and buff thoroughly.
Preventing Mold and Mildew in Your Bathtub
Good ventilation stops mold before it starts. Run the bathroom exhaust fan for at least 20 minutes after every shower. Open a window when weather allows to let moist air escape. This reduces humidity levels that mold needs to grow.
Dry the tub and surrounding walls after use. A quick wipe with a towel or squeegee removes moisture that soaks into caulk. Focus on the bottom edges where water pools. These habits greatly reduce the need for harsh mold cleaners.
Choose shower curtains or doors that allow air circulation. Glass doors need regular wiping, while curtains should be washed monthly in the washing machine. Mildew-resistant curtains or liners last longer in humid bathrooms.
Inspect hidden areas behind the tub and under the overflow regularly. Early detection of mold lets you address it with simple cleaning rather than major demolition. Good prevention keeps your bathroom healthier for everyone in the household.
Handling Hard Water Issues with Bathtub Maintenance Tips
Hard water leaves cloudy deposits that build up fast. Install a shower head filter or whole-house water softener if possible. For immediate help, wipe surfaces with vinegar solution several times a week. The acetic acid dissolves minerals safely.
Clean shower heads monthly by soaking them in vinegar to remove clogs. This improves water flow and reduces spotting on the tub. For severe buildup, use a commercial descaler following package instructions carefully.
Track patterns in your water quality. Some cities have harder water during certain seasons. Adjust your cleaning frequency during those times. Simple changes like these keep your tub clearer year-round without constant heavy cleaning.
Consider wiping the tub with a dry cloth after use to remove mineral-laden droplets before they dry. This habit alone cuts down on white scale marks dramatically over time.
Deep Cleaning Your Bathtub Step by Step
Deep cleaning happens every three to six months depending on usage. Start by clearing the area and removing all bottles and mats. Vacuum or sweep loose debris from the bottom. This preparation makes the actual cleaning more effective.
Apply a thick layer of cleaner or baking soda paste across all surfaces. Let it work for 15 to 30 minutes so it can break down layers of buildup. Use a soft brush on textured areas but stay gentle on smooth finishes to avoid scratches.
Pay special attention to the drain and overflow. Remove the drain cover and clean inside with a brush or pipe cleaner. Flush the system thoroughly with hot water after scrubbing. This step often reveals hidden hair and gunk that slow drainage.
Finish by rinsing multiple times and drying completely. Polish the surface if desired. A deep clean restores the original brightness and lets you inspect for any repairs needed, such as loose tiles or failing caulk.
Maintaining the Grout and Caulk Around Your Tub
Grout lines collect dirt and turn dark over time. Clean them weekly with a soft brush and mild solution. For deeper cleaning, use a grout sealer after thorough washing to make future maintenance easier. Replace grout that crumbles or falls out.
Caulk around the tub edges needs replacement every one to two years. Remove old caulk completely with a plastic scraper. Clean the joint thoroughly, let it dry, then apply fresh silicone caulk made for bathrooms. Smooth it with a wet finger or tool for a neat finish.
Choose mildew-resistant caulk for better longevity. Apply in dry conditions and avoid using the tub for 24 hours afterward. Proper caulk maintenance prevents water damage to floors and walls that costs thousands to repair.
Check caulk monthly for cracks or peeling. Addressing small issues quickly saves major headaches later. This part of bathtub maintenance tips often gets overlooked but protects the structure of your home.
Caring for Faucets and Fixtures
Faucets collect the same minerals and soap as the tub. Wipe them daily with a dry cloth. Use vinegar on a cloth to remove spots weekly. Polish chrome or brushed nickel finishes with a dedicated cleaner to maintain their shine.
Clean aerators on faucets every few months. Unscrew them and soak in vinegar to remove buildup that reduces water pressure. This simple task improves flow and saves water over time.
Check for leaks around handles and bases. Tighten connections or replace washers as needed. Small drips waste water and create stains below the fixture. Quick fixes here prevent bigger plumbing problems.
Shower heads benefit from regular descaling. Soak removable heads in vinegar overnight. For fixed heads, tie a vinegar-filled bag around them for the same effect. Clean spray holes with a toothpick or soft brush for even water distribution.
Common Mistakes to Avoid in Bathtub Maintenance
Many homeowners use abrasive cleaners or magic erasers too aggressively. These tools create tiny scratches that trap dirt faster. Stick to gentle methods and reserve stronger products for occasional deep cleans only.
Another frequent error involves letting cleaners dry on the surface. Always rinse completely after the recommended dwell time. Leftover chemicals can etch finishes or cause discoloration over repeated use.
Ignoring the area behind the tub or under mats leads to hidden mold. Move accessories regularly and inspect underneath. Good habits prevent surprises during deep cleans or home inspections.
Using too much product wastes money and leaves residue. A little cleaner goes a long way when applied correctly and given time to work. Measure or use sparingly for best results and easier rinsing.
When to Seek Professional Help
Some issues go beyond regular maintenance. Persistent leaks, large chips in the tub surface, or recurring clogs need a plumber or tub refinisher. Professional refinishing can restore old tubs at a fraction of replacement cost.
If mold appears in walls or ceilings near the tub, call a remediation expert. Hidden water damage spreads quickly and affects air quality. Early professional assessment prevents larger structural repairs.
Consider professional cleaning services once or twice a year if you have limited time or mobility. They use commercial tools and techniques that achieve deeper results safely. This option works well for busy families or older homeowners.
Know the signs that indicate bigger problems, such as spongy floors around the tub or musty smells that cleaning does not eliminate. Acting quickly on these warnings saves money and protects your home’s foundation.
Also, Learn How Long Does Bathtub Refinishing Really Last?
Final Thoughts on Bathtub Maintenance Tips
Consistent care turns bathtub maintenance into a simple routine rather than a dreaded chore. The tips shared here help homeowners keep their tubs clean, safe, and functional for many years. Start with daily wipes and weekly scrubs, then add deeper tasks as needed. Your bathroom will stay fresher and your tub will last longer.
Track what works best for your specific tub material and water conditions. Small adjustments based on your home’s needs lead to better results over time. Share these practical methods with family members so everyone participates in keeping the space nice.
Good maintenance brings satisfaction and reduces stress around home upkeep. A sparkling clean tub makes everyday bathing more enjoyable and supports overall home hygiene. Put these bathtub maintenance tips into practice and enjoy the benefits of a well-cared-for bathroom for years to come.